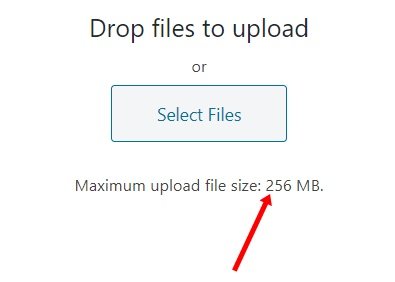
Hi, When you are setup new WordPress themes then WordPress giving you 2 MB/ 512 MB or something else file upload size in your Media Uploader or in most case many hosting provider also keeping this limit low by default, but you nothing to worry you have multiple ways about how to increase this and we can change this amount of uploading size so if you want to increase the maximum file upload size in your WordPress Dashboard. In this article, we will show you how to easily increase the maximum file upload size in WordPress to fix those issues just follow the below anyone method and customize the uploading size as per your needs.
METHOD 1
if you love to using the plugins then you can increase uploading file size.
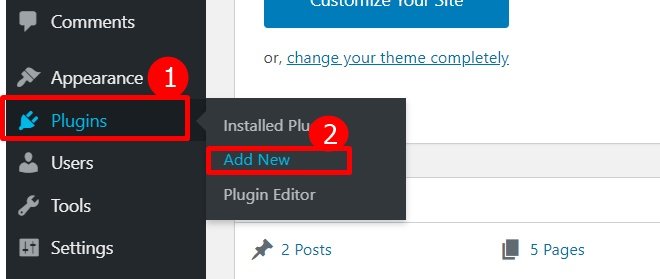
Step 1: Login to your WordPress Dashboard with your current username and password then go to the “Plugins” and click on “Add New” options under the plugins section.
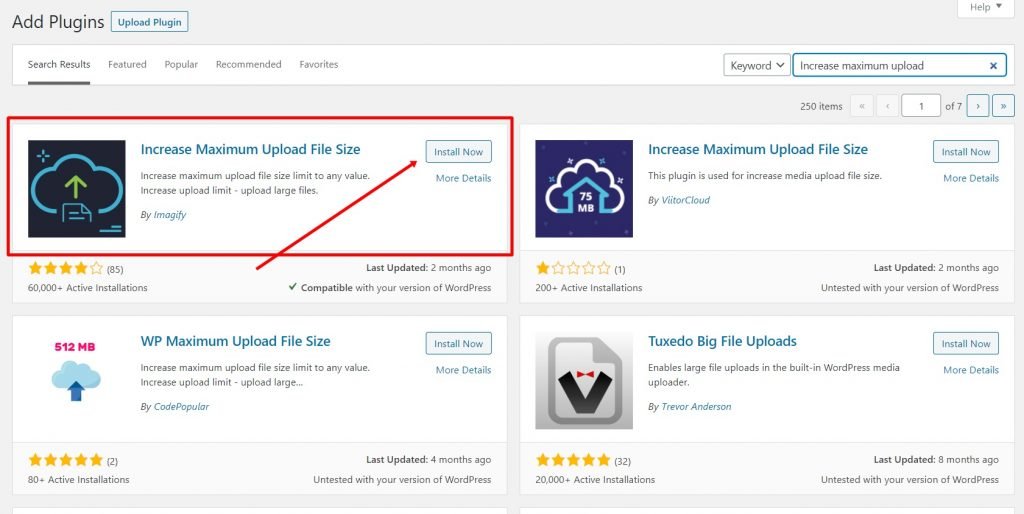
Step 2: Now search the word “Increase maximum upload” in search bar from top of right corner and wait a moment then you can see result here are lot of more popular plugins for increase the maximum upload file size for you, Now you can choose anyone plugins.
But herein i have chosen first result plugin “Increase Maximum Upload file Size” because it is highest downloaded and activated so i recommend you to choose this plugins and Click the “Install Now” button and active the current installed plugins.
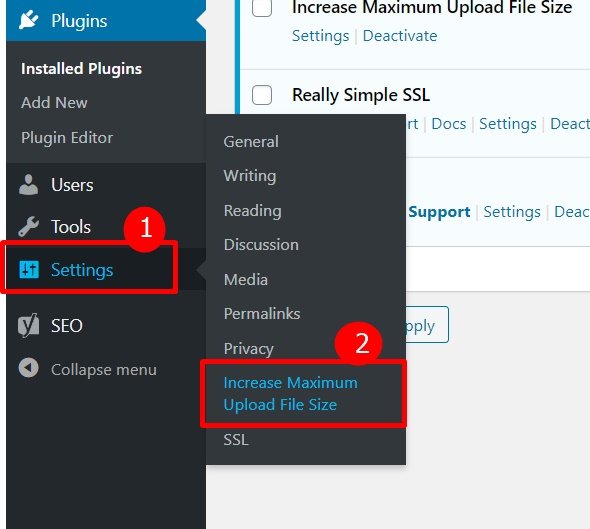
Step 3: After active the plugins then go to the “Settings” and click on “Increase Maximum Upload File Size” from under the settings section.
Step 4: Now click on “General Settings” and go to the “Choose Maximum Upload File Size” and click on drop-down icon then choose the any size of amount whatever you like to choose.
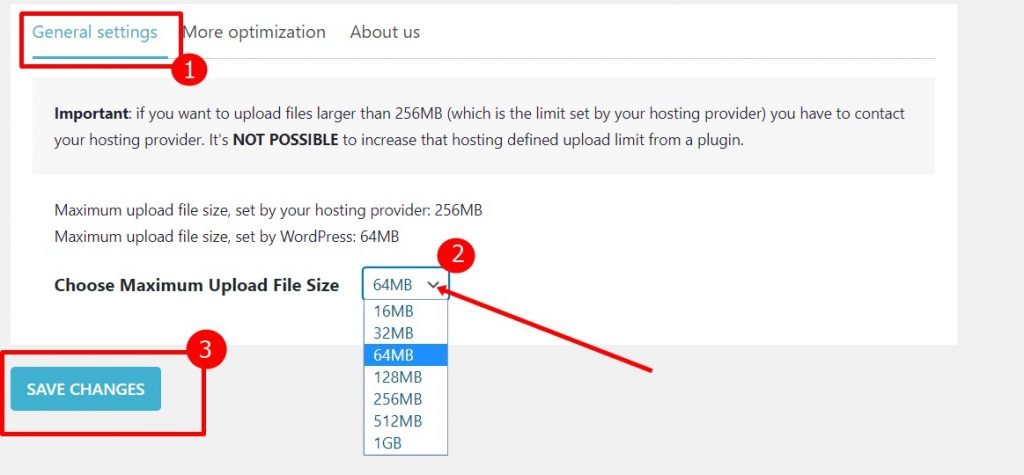
Now finally click on “SAVE CHANGES” button and enjoy yourself.
But if you don’t like to using any plugins if so then follow the below method.
METHOD 2
Step 1: You can also increase the upload size adding code in to your current theme’s “functions.php file” so go the functions.php file and copy and paste the following small code into functions.php file:
@ini_set( ‘post_max_size’, ’64M’);
@ini_set( ‘max_execution_time’, ‘300’ );
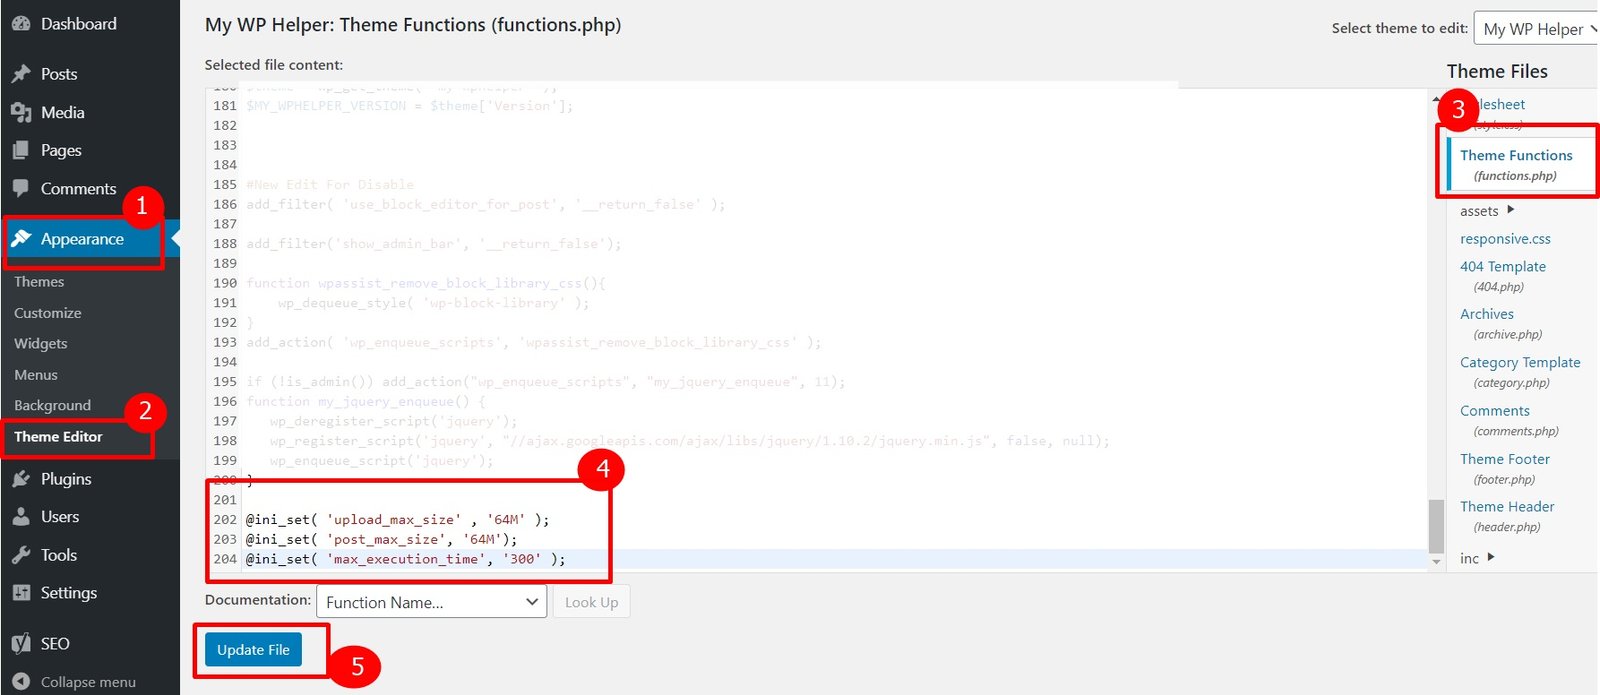
Now finally click on “Upload File” and save your job.
METHOD 3
if you have access root folder then you can also try this method or if you have not access the root folder then ask to your Hosting Provider or Web Developer for doing this method and copy the following code and paste into the inside .htaccess file in your WordPress site’s root folder and save now:
Step 1: Login to your hosting Cpanel with your cpanel’s username and password. and click on “File Manager” from the FILES section

Step 2: Now you are on Root folder so now click on “www” folder and find the .htaccess file in some case there are .htaccess file maybe hidden because this is security reason but you don’t worry click on “Settings” options and check the “Show Hidden Files (dotfiles)” options from the showing Preferences box. and click on “Save” button
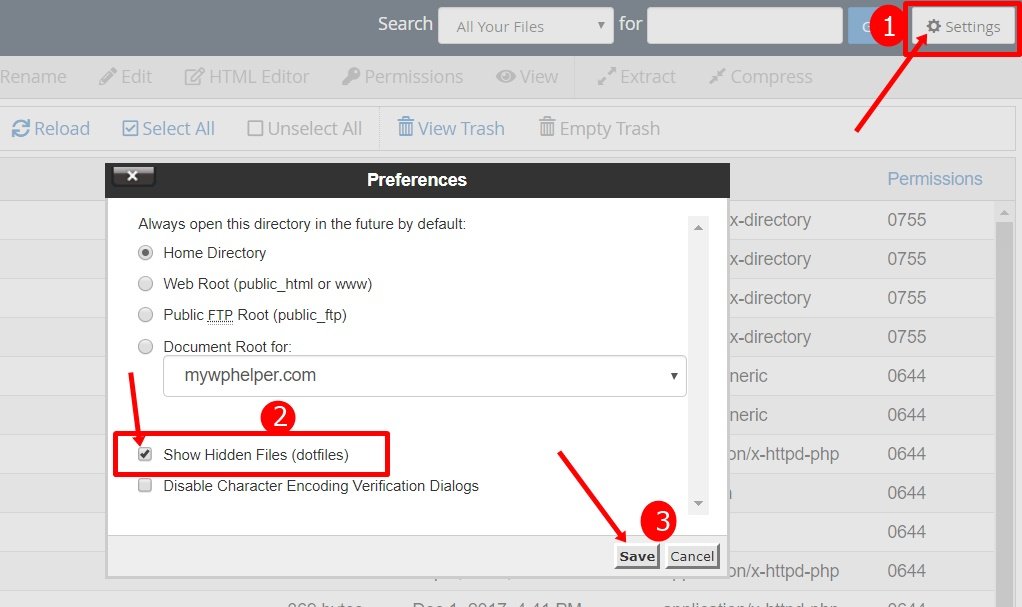
i hope now you will be see there .htaccess file now right click on this and edit the file.
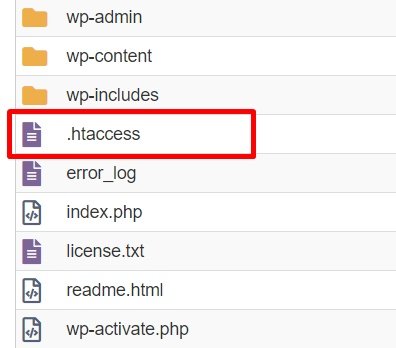
Now copy and paste the following code inside the file and save the file.
php_value post_max_size 64M
php_value max_execution_time 300
php_value max_input_time 300
you can change max upload size per your needs 64MB to whatever you like for example: 1024M=1GB
php_value upload_max_filesize 64M
php_value post_max_size 64M
Now finally go to your WP Dashboard and refresh the WP admin Panel or media uploader page then you can see there has changed uploading max file size.
METHOD 4
For using this method also you will need to access your site’s root folder by using FTP (File Transfer Protocol) or File Manager in your hosting account’s cPanel. So if you have access this login to cPanel or FTP Account with your current username and password or if you haven’t anyone this then ask your hosting provider or your Web Developer for access this.
Now follow the above Method 3’s step 1 and go to the “www” folder and find the PHP.INI file in there, and edit the file, in most cases if you are using a shared hosting, then you will not see a php.ini file in your directory. then you need to create a one new file called php.ini and in that file add the following small code:
post_max_size = 64M
max_execution_time = 300
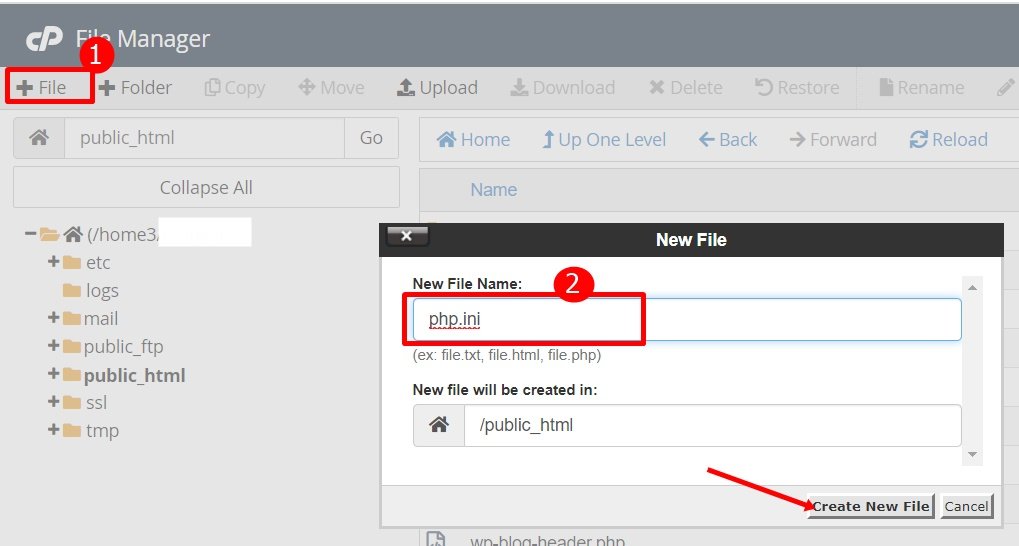
After create a new file then open this and paste above given code and save the work.
We hope maybe this article very helped you How to Increase the WordPress Maximum File Upload Size Multi Ways. If you are still having problems, then write the comment below thank you.
In the end
I hope you have found this article helpful. Let us me your opinion or questions if any through the comment form in below or use this form to ask your question.


