Are you beginner for WordPress? So in this tutorial we will share you about How to install Google Analytics on your WordPress Website from easy ways.
So if you want to install Google Analytics on your WordPress? About knowing how your audience interacts with your website is crucial for your success.
You can install lot of more from WordPress Plugins Manager related of audience analytics and Traffic stats plugins there are some plugins freeware and some plugins must be purchase but Google Analytics is a absolutely free of cost and also the best way to know your audience is through your traffic stats. So lets start for install analytics code on your WP site and track your visitor in to Google Analytics.
INSTRUCTION:
Step 1: First of all go to this link google.com/analytics and log in to your current Gmail and Password.

Step 2: Now click on “Sign in to Analytics” from right side top corner and access new page.
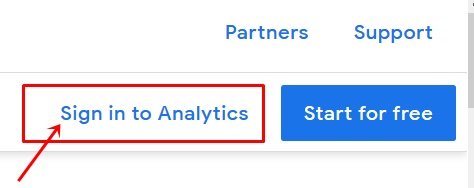
Step 3: Now click on “Set up for free” button from opened new page.

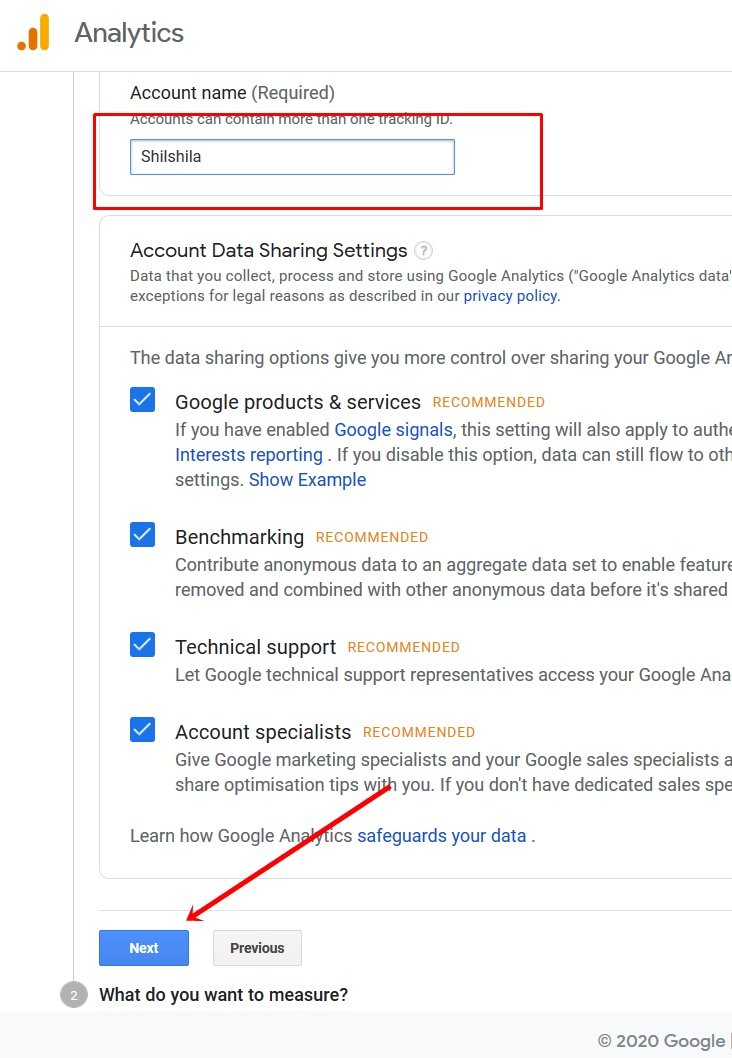
Step 4: Now on this new page Enter your Account name on “Account name (Required)” box and click on “Next” button from button of page.
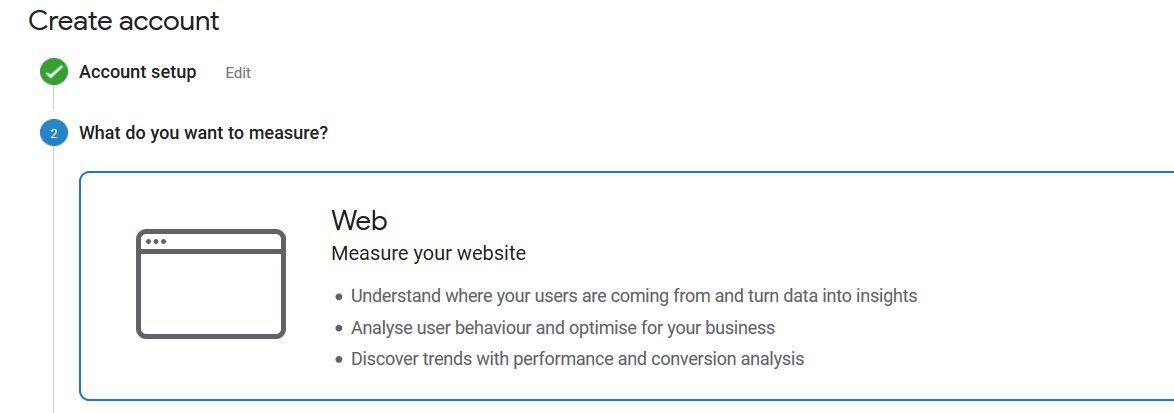
Step 5: Now here is asking you “What do you want to measure?” So you have to Choose “Web” platform and click on “Next” button from button of page
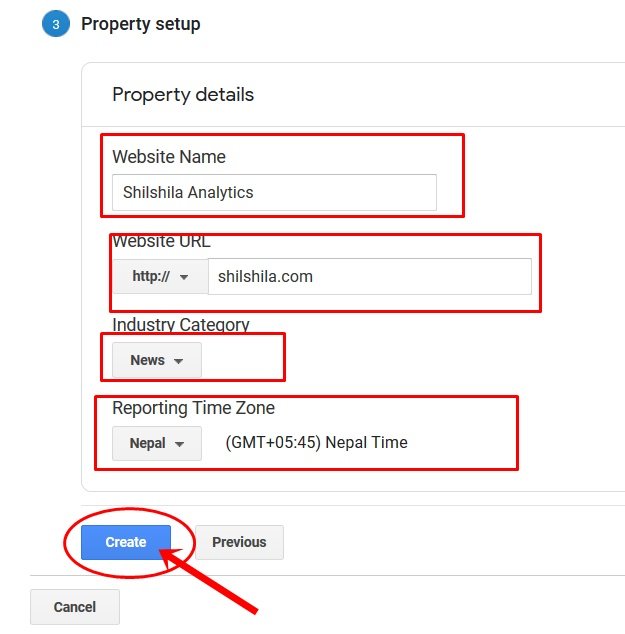
Step 6: Finally now on this page you have to setup Property for your Website:
For example:
- Website Name: Your Website name
- Website URL: your website URL without http or https (For example if your website is running on HTTPS so you need to also choose from drop down menu website URL from http:// to https:// and enter your domain name)
- Industry Category: Choose your website category
- Reporting Time Zone: Choose you own country time zone
Now after fill up the all field then click on “Create button” from last button
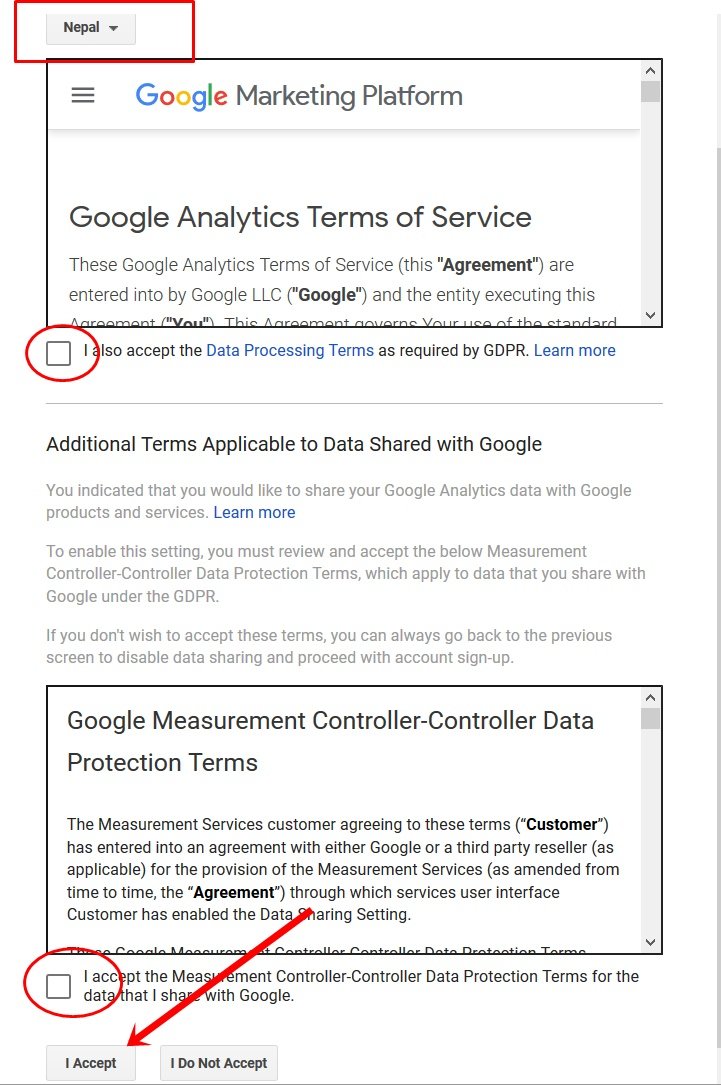
Step 7: Now on this box Choose your Country and Accept the Term of Service and Data protections Term from both conditions and Click on “Accept” button.
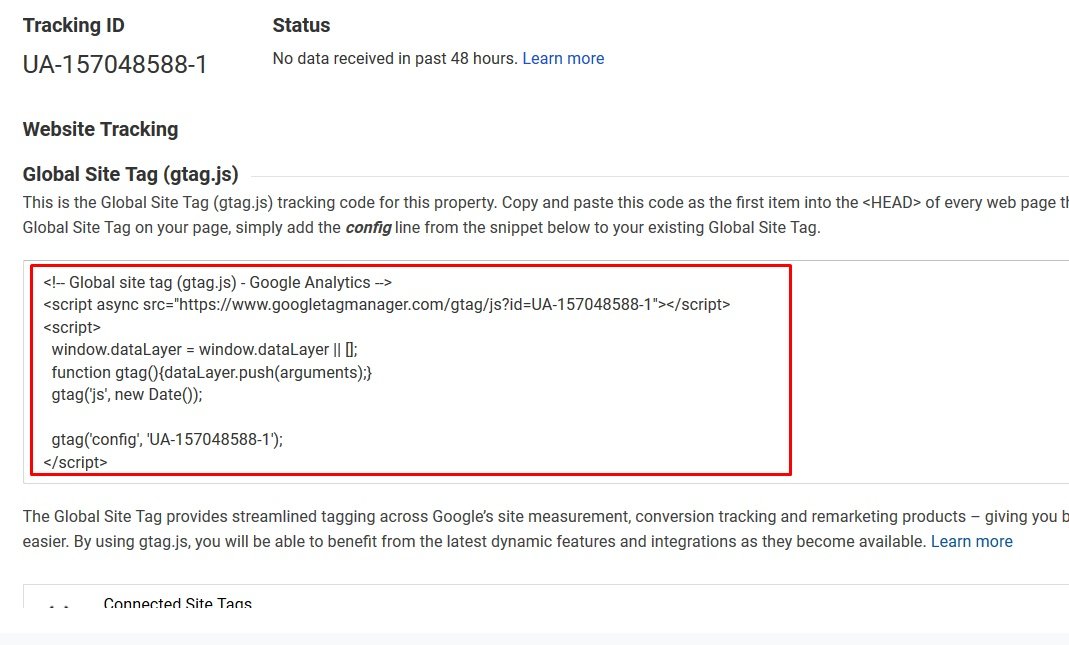
Step 8: Now Copy the Website Tracking Code from given page and paste into your Website Before </head> tags
How to find </head> tags on WordPress website:
You have multiple choice for find </head> tags on WordPress website, I mean to say you can access this tags from cPanel, For example by cPanel method:
- Login to your cPanel with your username and password (Note: if you have not this then ask your hosting provider or Web developer.)
- Now go to “File Manager” from FILES section.
- Now from File Manager page click on “WWW” folder.
- Go to wp-content => themes => YourThemesName => header.php and right click on header.php file and edit it.
- Find the </head> tags and paste the Google Analytics Tracking code before </head>

Now finally save the work from click by Save button.
The Above Method is used b y cPanel for insert code before </head> tags and now follow the below method for direct from WordPress Dashboard.
- Login to your WordPress Dashboard with your username and Password (Note: for this ways you are must be Full Administrator on WordPress user and must be enable Theme Editor options for you.)
- Now go to “Appearance” from left sidebar.
- Click on “Theme Editor” from Appearance menu.
- Find the header.php file from right sidebar.
- Now here find the </head> tags and paste the Tracking code before </head> closing tags.
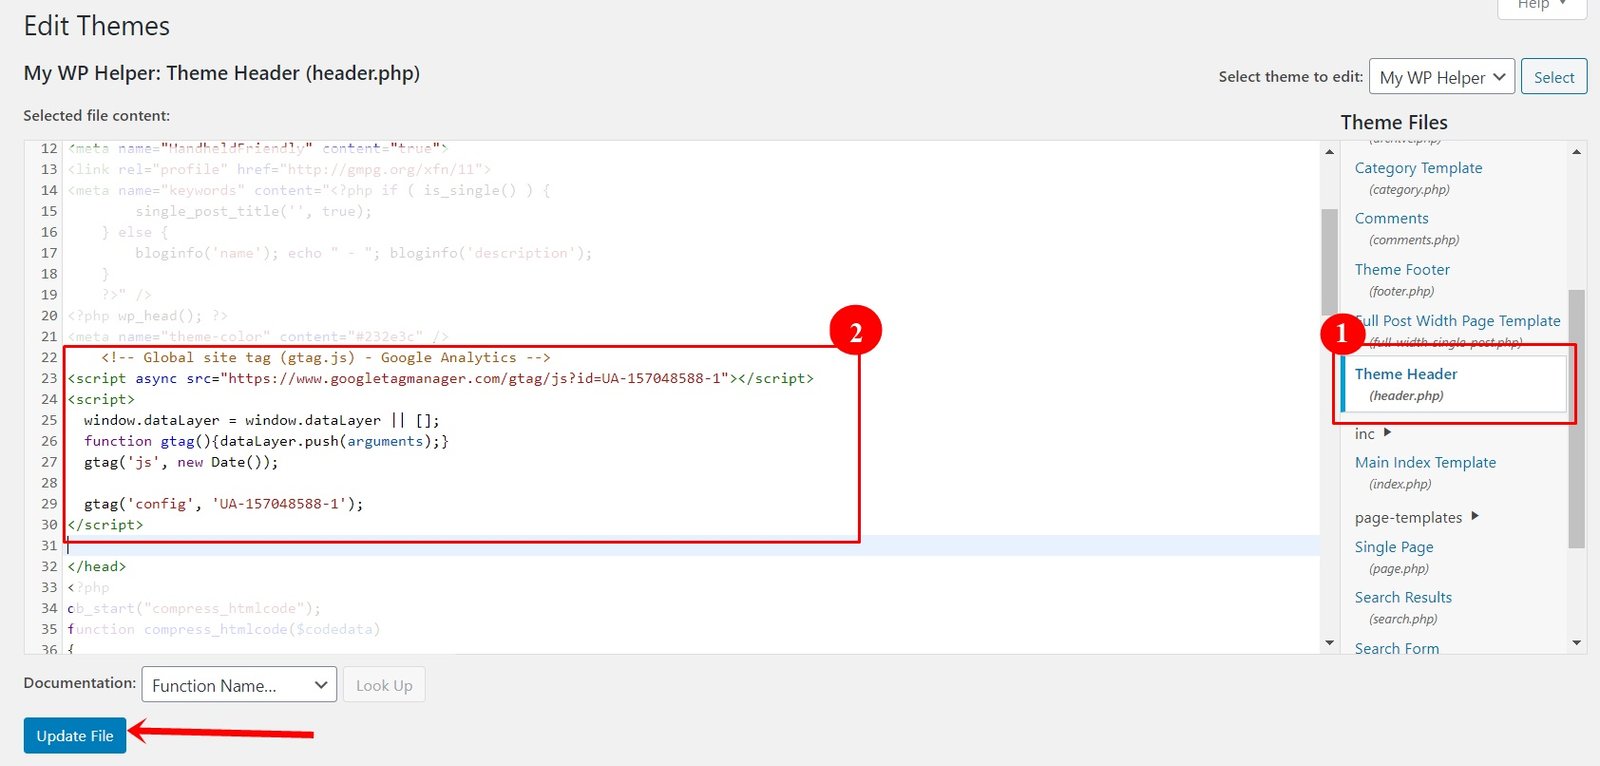
Now finally update your Themes file and reload the website.
I hope this Tutorial very help for you, If you have any comment please right us below without hesitate.
In the end
I hope you have found this article helpful. Let us me your opinion or questions if any through the comment form in below or use this form to ask your question.


